Sweet cherries are one of nature's greatest gifts. Not only are they delicious, portable, and oh so cute, but they are incredibly good for you as well!
The downside to cherries however, is that their peak season is extremely curt. While one (perfectly reasonable, if you ask us) method of coping with this unfortunate reality is to stuff yourself with as many cherries as possible until you are sick of them and simply can't face another cherry until next year, we offer you this alternative as well: freeze them!
Not only are frozen cherries good to have on hand for all of your favorite recipes, but they make a wonderful snack all on their own too. Stay tuned, we're showing you how to reap the benefits of cherry season for as long as possible in our simple step-by-step guide to freezing cherries!
Table of Contents
Cherry Basics
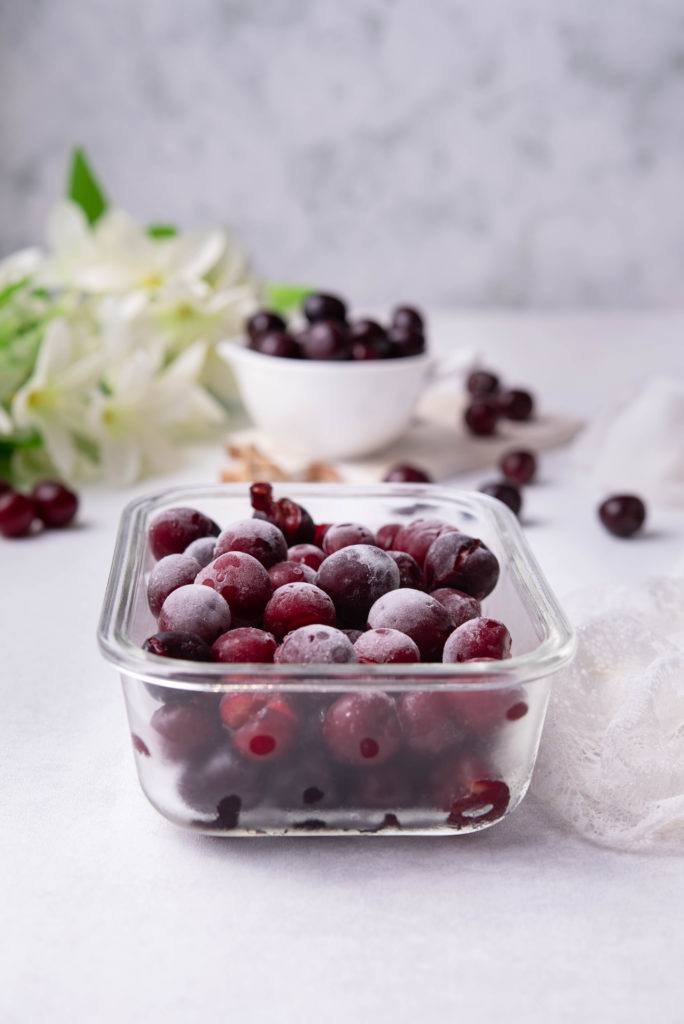
Cherries belong to a category of plants known as drupes, whose defining characteristic is a pit residing in the center of a fleshy fruit. This pit is also known as a “stone” hence the colloquial term for these types of fruits: stone fruits!
Cherry trees are thought to have originated in eastern Europe and have since spread their reach to be cultivated in all regions of the world, save for areas that experience especially harsh winter weather. Depending on the region, cherry season ranges from May to August, with peak season occurring in July.
The word cherry often brings to mind imagery of brilliant red, but there are many cherry species and not all of them are “cherry red”. Rainier cherries have a distinctive flesh which is somewhat of a tie-dye mixture of red and bright yellow. Sour cherries are on the smaller side and sport a red flesh only rivaled by a new Corvette. And then there’s the Bing cherry: deep reddish purple, with a perfectly sweet-tart taste.
Equipment Needed for Freezing Cherries
No matter what particular type of cherries you have, our step-by-step freezing method will work for you! Thankfully you need just a couple of kitchen items to get going:
Baking Sheet or Wire Rack
Whether your baking sheet is shiny aluminum or has a nonstick coating, it will do the job here! The most important characteristic here is that it is flat, so that the cherries stay put as they are freezing. We also recommend choosing a rimmed baking sheet if you have it as opposed to a rimless cookie sheet.
No baking sheet--or, you only have one that is too large for your freezer? You can also use a wire rack, large freezer-safe plate, or a platter!
Parchment Paper
It’s important to line your baking sheet or other surface with something to prevent the cherries from holding on as they freeze. A sheet of parchment paper or freezer paper is your best bet, but wax paper will also work. In a pinch you could use a clean kitchen towel, but definitely avoid paper towel, as the cherries will adhere to it as they freeze and you’ll wind up with tiny bits of paper towel in amongst your frozen cherries.
Also, aluminum foil is a no go here! Aluminum is known to react with acidic foods and as cherries (and most fruits) have a naturally occurring acid content, this reaction could negatively affect the taste and appearance of the cherries.
Cherry Pitting Tool, Chopstick, or Knife (Optional)
If you decide to pit cherries before freezing them, you’ll need a tool to help you out. An actual cherry pitter tool will be ideal if you have it, but you could also use a chopstick or a simple paring knife as well.
Freezer-Friendly Storage Containers
Once the cherries are frozen solid, you’ll need to transfer them to well-sealed containers in order to protect your precious fruits from freezer burn. Our favorite container for this task is a resealable freezer bag, as this allows you to reshape and tuck your package of frozen cherries wherever it fits. You can also use freezer-safe plastic or glass tupperware style containers as well.
How to Freeze Fresh Cherries: Step-By-Step
Step 1: Wash the Cherries

You want to make sure that your fresh cherries are nice and clean before freezing them, so place them in a colander under cool running water, agitating them gently with your hands. Once they are rinsed, spread the cherries on clean kitchen towels to dry completely.
Step 2: Remove the Stems and Pits
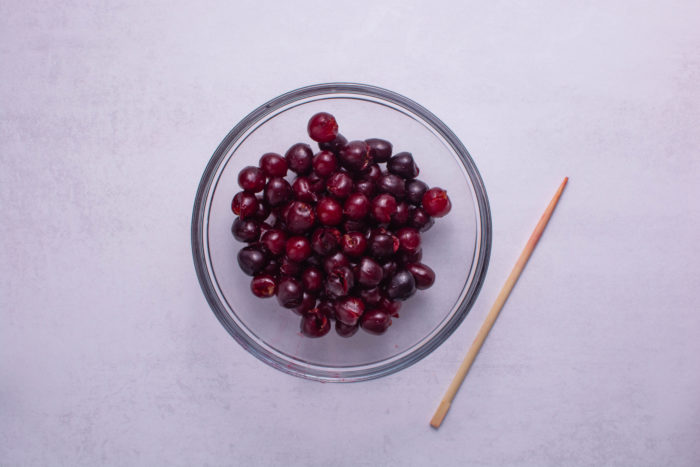
It’s up to you whether you pit the cherries before or after freezing them (we’ll weigh out the pros and cons of this dilemma in the next section!) but either way, you should definitely remove the stems.
If you’re skipping the pitting, move on to Step 3. If you opt to remove the pits as well, there are several ways you can go about this:
- Use a cherry pitter tool, which works by pushing a plunger through the core of the cherry, thereby removing the pit.
- Use chopsticks! Just place the cherry between your thumb and index finger, then starting at the stem end, gently push the chopstick down to the pit until it exits out the other side of the cherry.
- You can also use a paring or small kitchen knife to cut the cherries in half and remove the pit with the tip of your knife.
- Or, you can tear each cherry in half with your fingers and remove the pits. This method is the least ideal--and the messiest!--but it will still get the job done.
Step 3: Arrange the Cherries
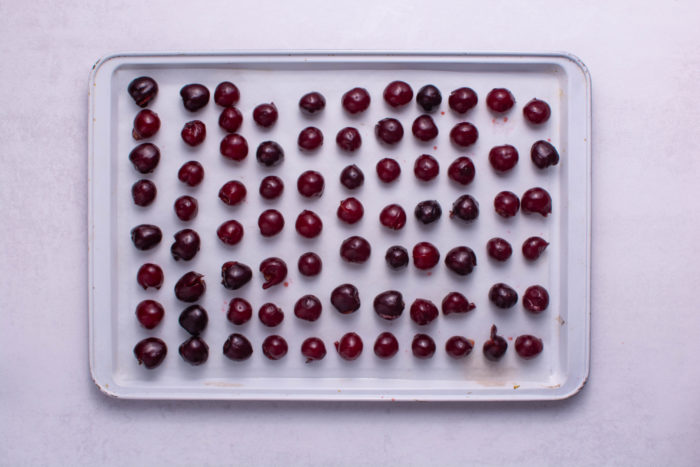
Once the cherries are pitted (or not), arrange the whole or halved cherries on your baking sheet lined with parchment, wax, or freezer paper. Be sure to place the cherries in a single layer with a bit of space between each one and its neighbor, as this will help to prevent them from sticking to each other during the freezing process.
Step 4: Freeze the Cherries
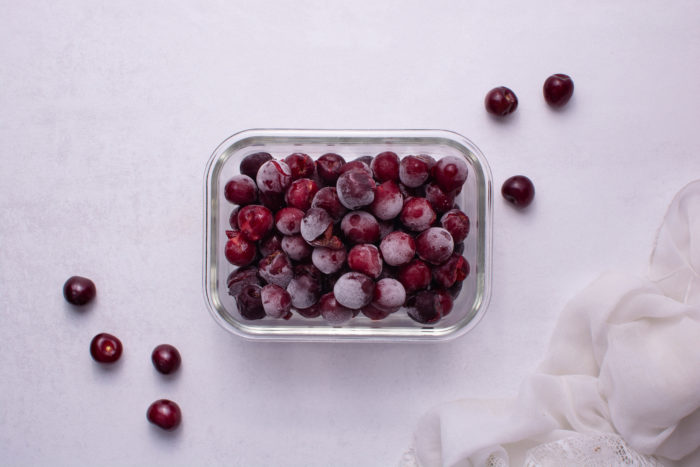
Carefully place the sheet of cherries in the freezer, taking care to place them in a spot where they can remain flat and undisturbed. After a few hours, the cherries should be completely frozen. The freezing time could take a bit longer depending on the size of the cherries, as the smallest cherries may only take an hour or two to freeze while the biggest cherries may take longer.
Step 5: Repackage the Cherries
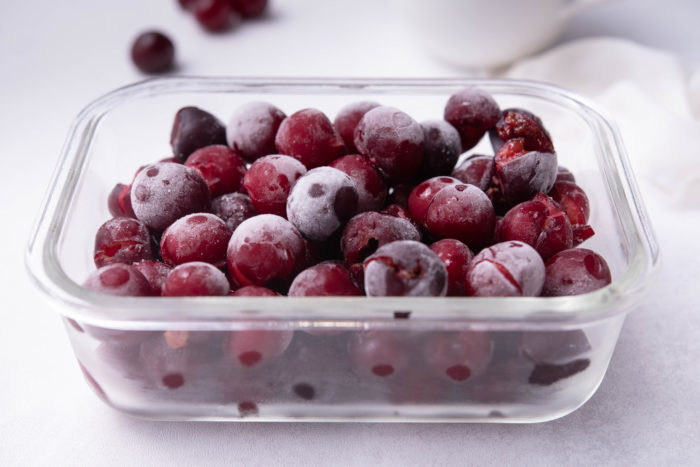
Once frozen through, you are free to transfer your cherries into any freezer-friendly airtight container you like! If you opt to use freezer bags, be sure to squeeze them to remove as much air as possible, as doing so will help to prevent freezer burn and ice crystallization. Take a minute to label and date your packages of frozen cherries so that you can easily identify what your items are and when they are from.
Our video on How To Freeze Cherries
Ideas for Using Frozen Cherries
- Eat them whole! A fresh cherry is nature’s candy, and freezing them is one way of making a delicious food even better, especially during those hot summer months.
- Drop a few whole frozen cherries into any glass of water, sparkling water, or juice for a refreshingly chilled beverage that comes with an added bonus: you get to eat the cherries at the bottom!
- Our Vegan Cherry Fruit Bars calls for store-bought cherry pie filling, but if you have a little extra time, you can make your own using your frozen cherries! Simply simmer cherries and plain sugar (to taste) until the mixture is nice and syrupy. Whisk in 1 tablespoon of cornstarch per every cup of cherries used and simmer for a couple more minutes until thickened. Your pie filling is ready to use!
- Mix chopped frozen cherries into your next batch of overnight oats, and wake up to a breakfast that is packed with all of the goodness of cherries and perfumed by their perfectly sweet-tart taste.
- Toss a handful of frozen cherries into any smoothie or fresh juice while blending for an added boost of cherry flavor and bright red color.
How to Defrost Frozen Cherries
As you can see, in many cases you can enjoy your cherries straight from their frozen state, whether you are eating them plain or using them in a recipe. However, if you do end up needing to defrost them, there are a couple different ways you can do so:
Option 1: In the Refrigerator Overnight
This thawing method is as easy as (cherry) pie! Simply take your freezer bag or other container of frozen cherries out of the freezer and place it into the refrigerator for about 6-8 hours, or overnight if possible. This allows the cherries to slowly defrost, which is not only safer, but yields better texture and flavor as well.
Option 2: Submerge in Cold Water
This method is ideal if you need your cherries sooner than later or forgot to take them out of the freezer the night before (been there!) You don’t want to place the frozen cherries directly in the cold water as they will lose some of their delicious flavor, so be sure that your fruit is in a watertight resealable plastic bag. Remove any excess air from the package, then place the bag of frozen cherries in a bowl of cold tap water. Leave it on your countertop, where it should be done thawing in 15-20 minutes, depending on the size of your cherries.
It's important to use cold water for this thawing method, as using hot or lukewarm water to defrost the fruit could set the stage for rapid bacterial growth. When it comes to warming foods, cool and slow is always the safest!
Freezing Cherries Tips and FAQs!

To Pit or Not to Pit?
The thing is, pitting cherries is the pits. Even with the right tool, it’s a time consuming and messy endeavor. So, let’s get into whether or not you want to pit your cherries before freezing them or save the task for after.
If you’re short on time and just need to get those cherries into the freezer, go ahead and freeze them with the pits inside! The good news is that it will not affect the freezing process at all. However, you must be extra careful to label the package as containing pits, so that no one is surprised when biting into one, nor are there any attempts to toss un-pitted cherries into the blender.
If you’d like to save yourself a future headache though, we definitely recommend pitting the cherries ahead of time. Not only does this remove the concern of any tooth injuries, but it also widens the world of ways in which you can use your frozen cherries--allowing you to simply toss them straight from the freezer into smoothies, juices, recipes, and sauces.
How Long Do Frozen Cherries Last?
As far as fresh fruits go, cherries have a decent shelf life, lasting about a week when stored properly and in the refrigerator. If this isn’t quite long enough though, or if you have a lot of cherries on your hands, freezing them will extend their lives by a longshot. You can keep cherries for 6 months in a regular freezer or up to a year in a deep freezer!
Why is it Important to Wash the Cherries?
It is always good practice to wash your fresh produce items--a practice that is more important for some fruits and vegetables over others. Cherries are notoriously susceptible to pests and disease, meaning that farmers often rely on certain pesticides and chemicals to protect their valuable crops.
In fact, cherries often rank on the Environmental Working Group’s annually published “Dirty Dozen” list, which features those fruits and vegetables which have been found to contain the highest amount of pesticide residue. Aside from pesticides and chemical fertilizers, there is always the potential for the fruit to become exposed to bacteria and other pathogens through handling.
The good news is that you don’t need any special soap or fruit wash to clean your cherries, just a thorough rinse under cold running water has been shown to remove a great deal of contaminants. Once clean, be sure to get your cherries good and dry by spreading them on a kitchen towel before freezing.
How Can You Tell When Cherries Are Ripe?
Determining ripe cherries from unripe cherries can be a little tough as you can’t necessarily judge them by their coloring. One excellent clue to ripeness is if the stems pull easily from the fruit. Another thing to look out for is the overall texture of the cherries. They should be juicy and firm, while still yielding a gentle squeeze.
Are Frozen Cherries as Healthy as Fresh?
It’s no secret that cherries are packed with health benefits! These little jewels prove that good things come in small packages, as each serving of fresh cherries contains a load of vitamin C, dietary fiber, anthocyanins, and carotenoids.
Many of these compounds act as antioxidants in the body, warding off cell deterioration--and potentially some types of cancer--by preventing free radical damage. Unfortunately, antioxidants are sensitive to cold temperatures, meaning some of these compounds may be lost during the freezing process. Rest assured though, plenty will remain!
How to Freeze Cherries: The Bottom Line
As you can see, freezing cherries is just about as easy as one, two, three! Okay there may be a few other steps involved and considerations to make, but once your perfectly ripe cherries are clean and pitted (if you so choose), it just takes a few hours of freezer time.
In many areas, cherries will be available in major grocery stores year round, but as you may already know, these off season fruits are greatly lacking in flavor as compared to the ones that are harvested during the peak season. You’d do well to make the most of cherry season when it rolls around in your area and use our guide to pack some away into the freezer. They’ll be ready when you are!
📋 Recipe

How To Freeze Cherries
Equipment
- Baking sheet or wire rack
- Parchment paper
Ingredients
- Fresh cherries
Instructions
- Before you start make sure your cherries are washed.
- You can freeze them with a pit or without a pit. There are several ways to remove the cherry pit.
- The easiest is to use the cherry pitter tool. If you do not have this, then you can:-Use chopsticks; place the cherry between thumb and index finger. Gently push the chopstick down to the pit and push out the pit gently.-You can also cut the cherries in half and remove the pit.-And my least favorite method, the messiest one, is to tear the cherry and remove the pit.
- Once your cherries are pitted place them on a baking tray, lined with parchment paper. Give some space between the cherries, so they do not stick together.
- Place the cherries into a freezer for 2-4 hours or until firm.
- Transfer the cherries to a freezer-friendly container or zip-lock bag and store them in a freezer for 6 months.




Leave a Reply