

In any tomato-growing region, the advent of tomato season is a big deal. Whether you grow them yourself, plunder the local farmer’s market for as many basketfuls as you can gather, or you simply stock up at your favorite supermarket whenever you get the chance--there is never such a thing as too many juicy tomatoes!
Scoring as many of these sweet yet savory tart fruits as possible is never a bad idea, however, it can leave you scratching your head about what to do with them all. While home canning used to be the main--and hugely time consuming--method for preserving tomatoes, there is now another way to extend the life expectancy of your ruby red treasures.
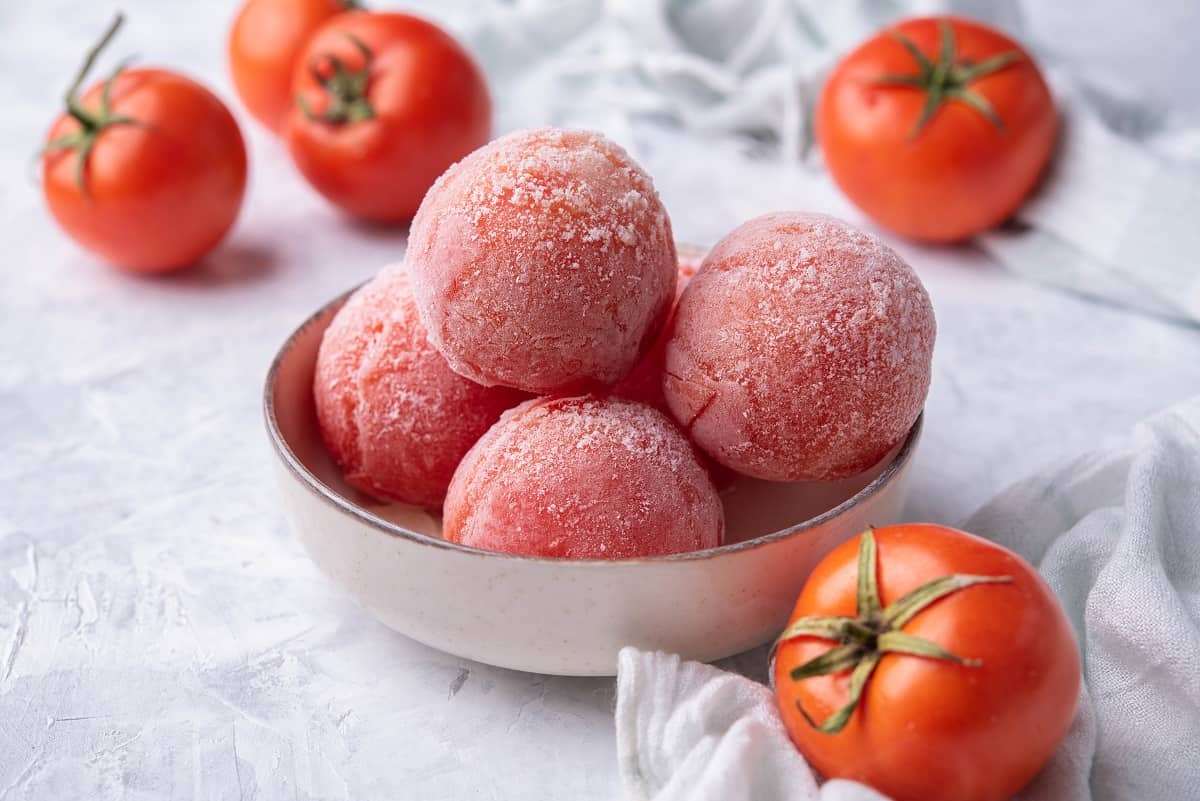
We’re walking you through how to freeze fresh tomatoes. Spoiler alert: it’s so easy that you’re just a few simple steps away from getting your tomato stash safely into the freezer for long term storage!
Table of Contents
Ingredients & Equipment Needed for Freezing Tomatoes
Thankfully, you don’t need any fancy supplies or specialized equipment to prepare your ripe tomatoes for a long haul stint in the freezer. Just a few commonplace kitchen items will do the trick!
Ripe Fresh Tomatoes
First and foremost, let’s talk about those tomatoes. The freezing method outlined below is only recommended for ripe, large, whole tomatoes such as beefsteak tomatoes, garden tomatoes, and plum/paste tomatoes.
Under ripe or green tomatoes will not work well here, nor will small cherry tomatoes or those that have already been chopped or sliced. We also don't recommend using this method for freezing stewed tomatoes or any that are otherwise cooked.
Take care to be sure that your tomatoes are not too ripe, as overly mushy tomatoes tend to fall apart during the blanching and freezing process. And if your tomatoes are on the edge of rot or have some dark spots, it’s best not to freeze these as they will only get worse the longer they hang around.
Paring Knife
This can be whatever small knife you are most comfortable working with. Knives that are smaller and more dexterous tend to be most useful in this situation, and you may find that a small bird’s beak or serrated knife is especially helpful here.
Large Pot
Depending on how many tomatoes you aim to freeze, you’ll probably want to reach for your largest soup pot or stock pot to help you with this task. You want to be sure that the tomatoes can be fully submerged in water without being overcrowded.
Wire Rack (optional)
A wire rack may be useful when it comes time to cool your tomatoes before peeling them, but this is not required. If you have one though, go ahead and bring it out!
Baking Sheet
You’ll be freezing your tomatoes directly on a baking sheet, so the key here is to choose a pan which will fit flat in your freezer. If this isn’t an option for you, choose a smaller freezer safe dish or plate.
Parchment Paper
We love using parchment to prevent those frozen tomatoes from sticking to the sheet pan, but you could also use wax paper here, or even a layer of plastic wrap will do the trick! We don’t recommend using aluminum foil in this case as it can react with the acidity of the tomatoes and cause an odd coloring and/or an off flavor.
Freezer-Friendly Storage Containers
You’ll need some airtight containers for long term storage of your frozen tomatoes, but it’s up to you whether you prefer freezer bags, freezer-safe tupperware style containers, or another option.
The main thing to keep in mind is to choose an airtight container so as to keep your produce safe from freezer burn, and one that also works well for your particular freezer space and shape limitations. Read more about different freezer-friendly storage containers in our guide to Containers for Freezing Food!
Step-By-Step Guide to Freezing Whole Tomatoes
Freezing fresh tomatoes is easy, requiring just 8 simple steps.
Step 1: Wash the Tomatoes

Whether you get it at the farmer’s market or a grocery store, washing your produce is always a good idea. When you plan on freezing said fresh produce, this is even more important as you don’t want any lingering bacteria or contaminants to find their way into your freezer!
Simply run your haul of ripe tomatoes under cool running water and gently scrub with your hands, or, break out your favorite fruit & veggie wash.
Step 2: Core the Tomatoes
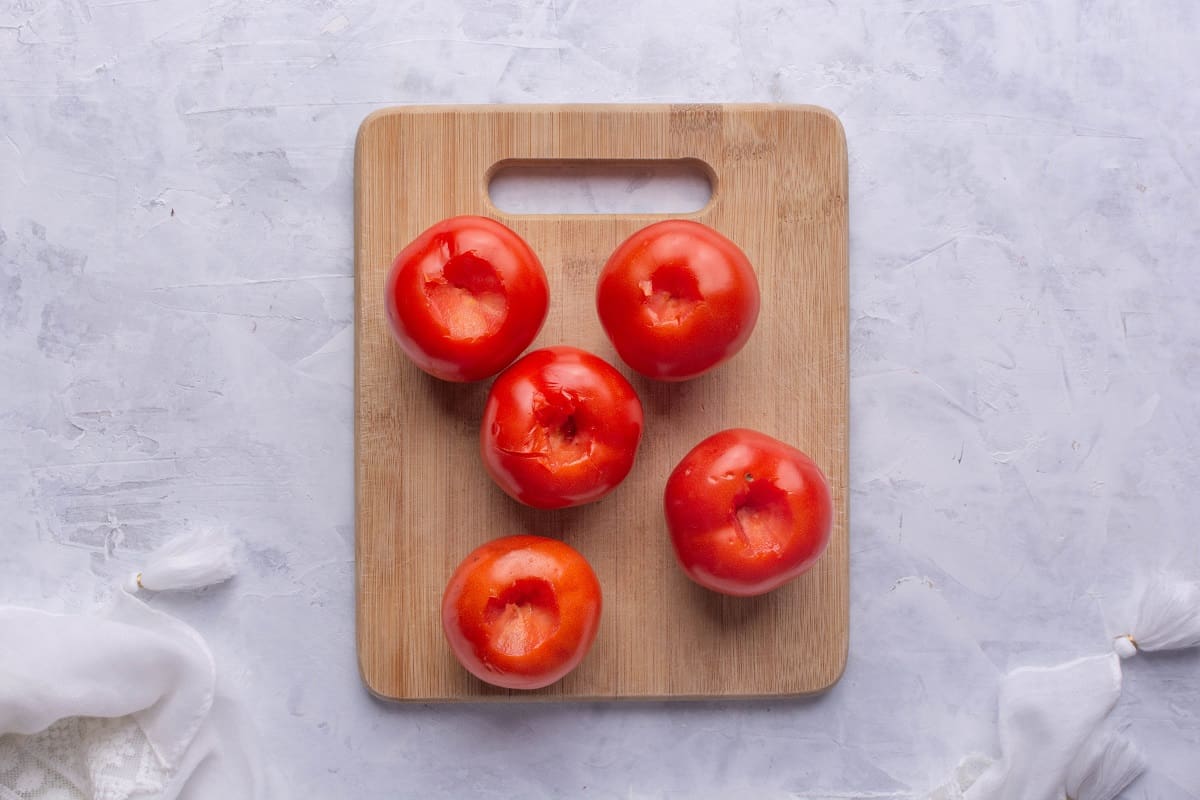
Use your paring knife to remove the stem and core from each tomato. If there are any other blemishes or if the opposite end of the tomato features a woody spot, go ahead and remove these areas as well.
Step 3: Score the Tomatoes
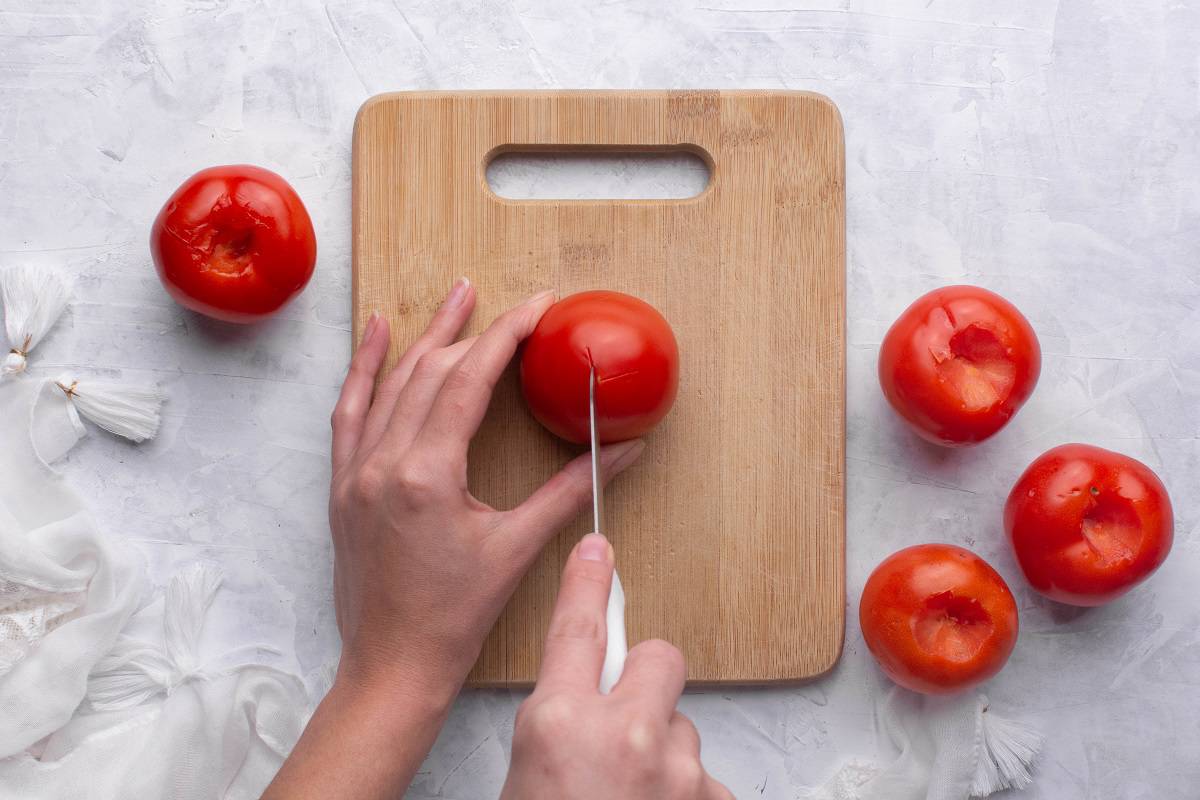
Using your paring knife, score the bottom (the end opposite the stem) with an “X” mark. You don’t want to cut too deeply here, the idea is to get through the outer skin and just barely into the surface flesh. This will help you to remove the skins when it comes time.
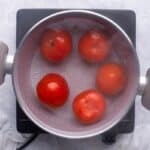
Step 4: Blanch the Tomatoes
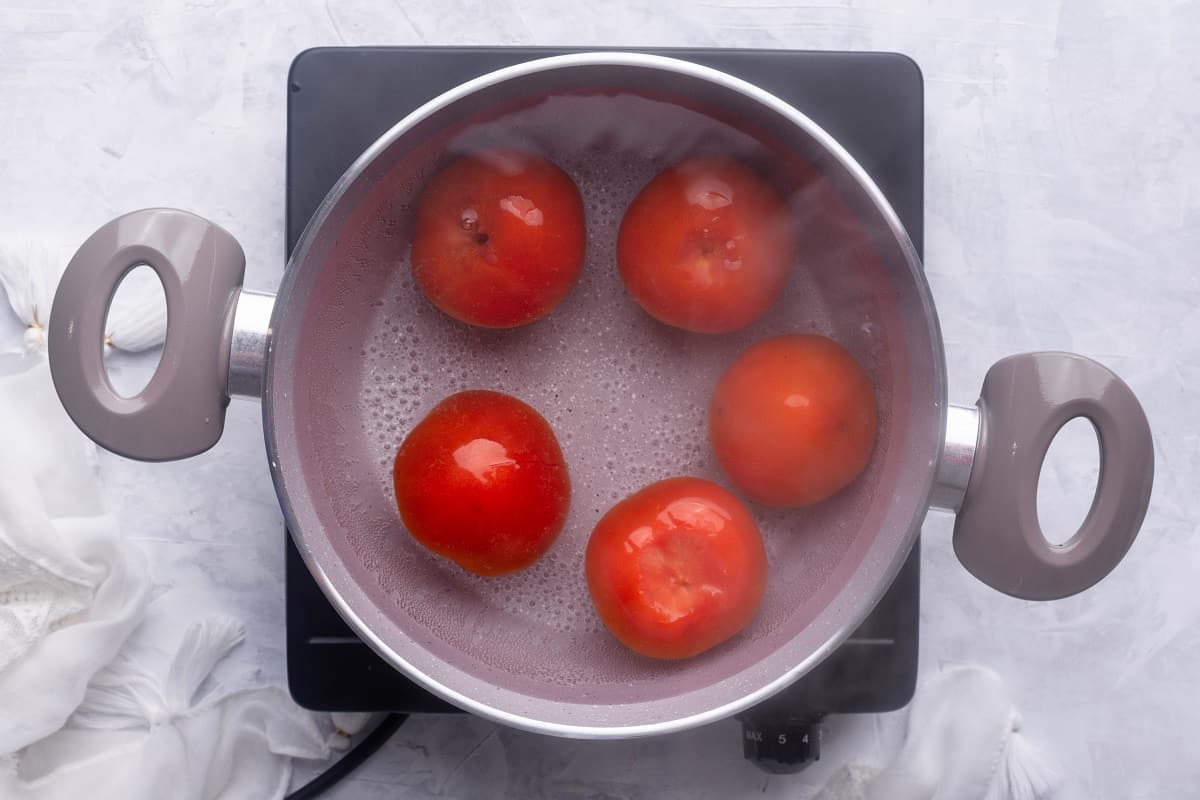
Fill your large pot with water and bring it to a simmer over medium-high heat. Add the tomatoes to the water and simmer them briefly--about 30-40 seconds should do it. When you blanch tomatoes, you want to be sure to keep the water at a moderate simmer as rapidly boiling water will be too rough on these gentle fruits.
Also, depending on the size of your pot and how many tomatoes you’re working with, you may need to blanch just a few tomatoes at a time. It’s crucial that each batch of tomatoes has plenty of room to swim around and receives an equal share of the heat!
Step 5: Peel the Tomatoes
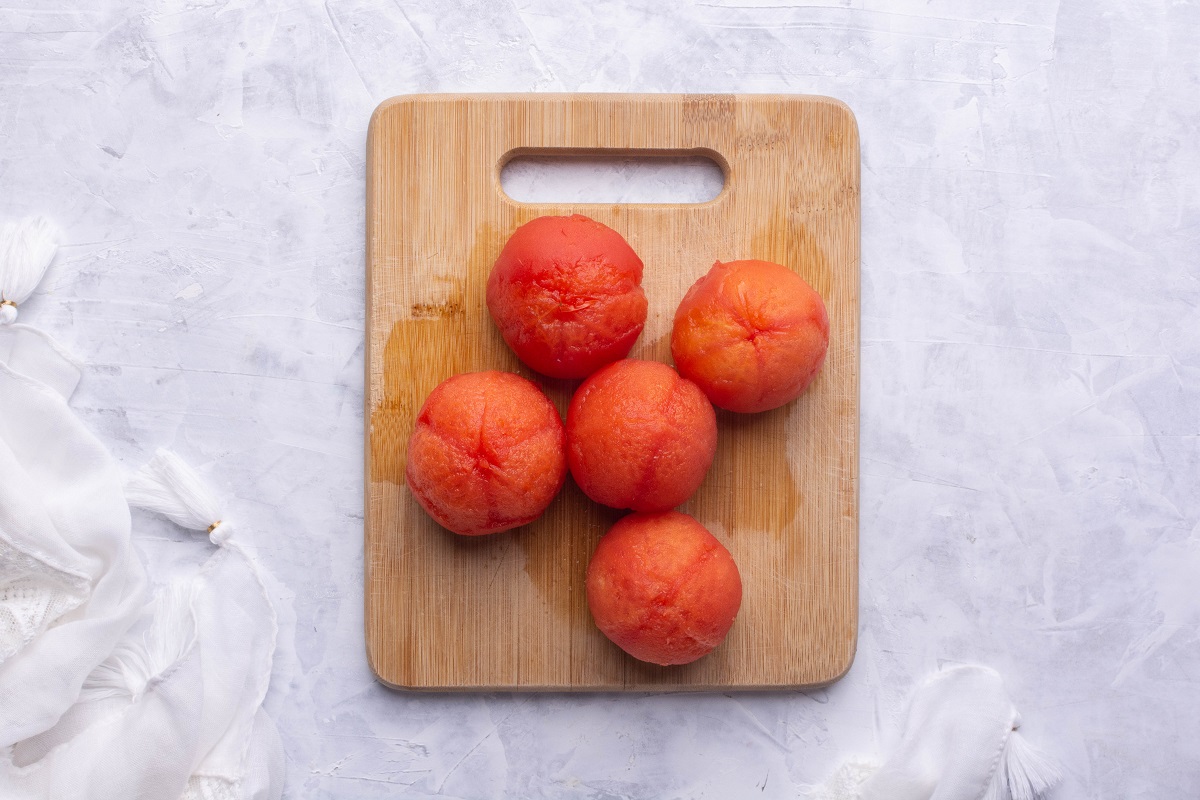
Using a slotted spoon, remove the tomatoes from the hot water and place them where they can cool--either on a wire rack, if you have one, or on a clean kitchen towel. If you’d like to accelerate the cooling process, you could also give each tomato a brief dunk in a bowl of ice water.
Once cool enough to handle, start at the “X” mark on each tomato and peel the tomato skins away. They should slip off fairly easily, but feel free to use a paring knife to assist if needed.
Step 6: Arrange & Freeze the Tomatoes
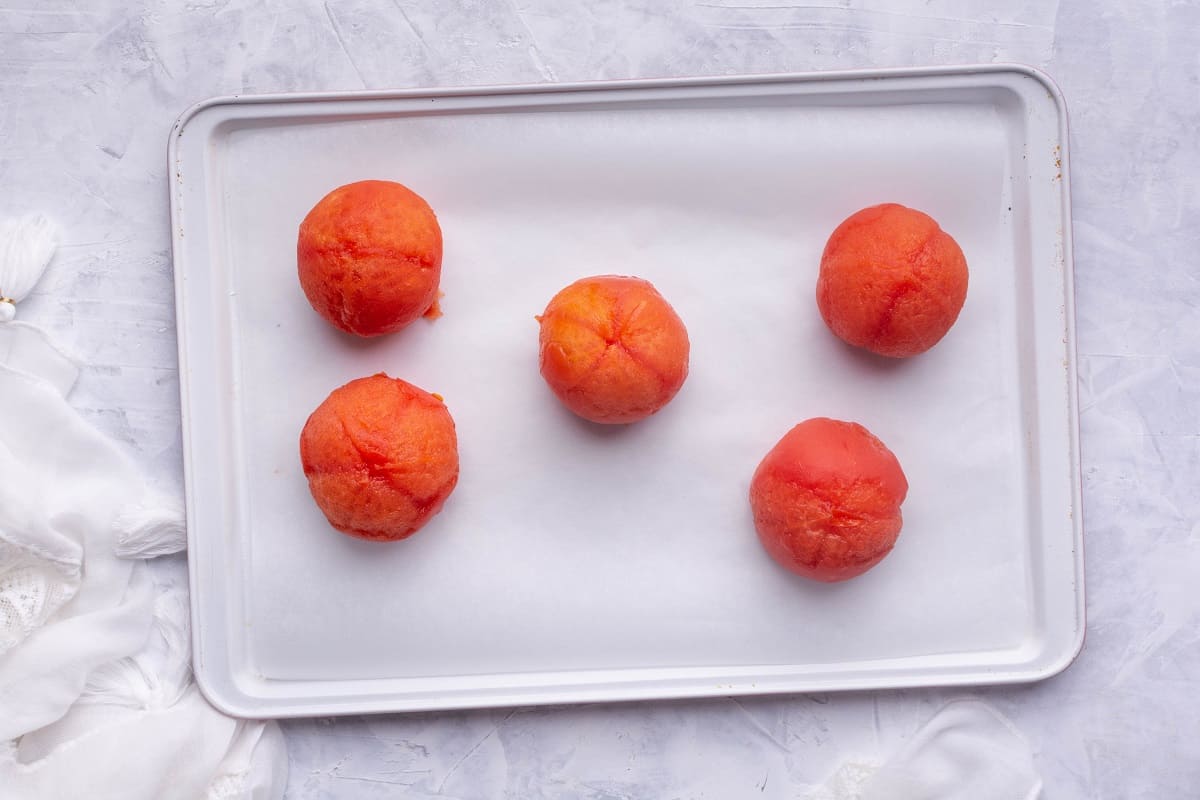
Line a baking sheet with parchment paper (or wax paper or plastic wrap, as discussed above) and arrange the peeled tomatoes in a single layer. You want to be sure the tomatoes have ample room and aren't touching one another.
Place the baking sheet of tomatoes in a flat place in your freezer where they can remain undisturbed for about 4 hours, or until they are frozen solid.
Step 7: Repackage the Tomatoes
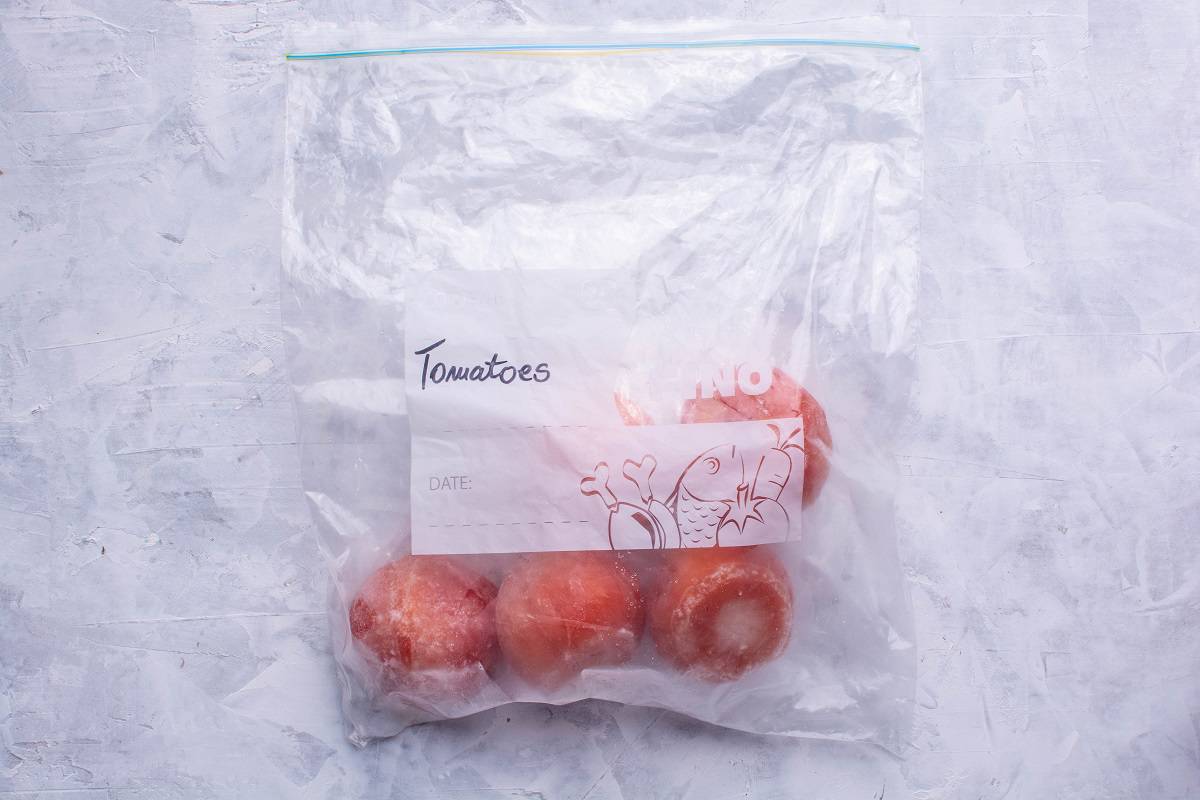
Once frozen through, remove the tomatoes from the baking sheet and repackage them into their long term storage container. We recommend using a freezer bag, for this as it tends to be the most compact option. Just be sure to remove as much air from the bag as possible before sealing, as this will help to protect the tomatoes from freezer burn.
If you’d like to use hard-sided freezer-safe storage containers, that works perfectly too! It’s all about your personal preferences as well as making the best use of the room in your freezer.
Step 8: Store the Tomatoes
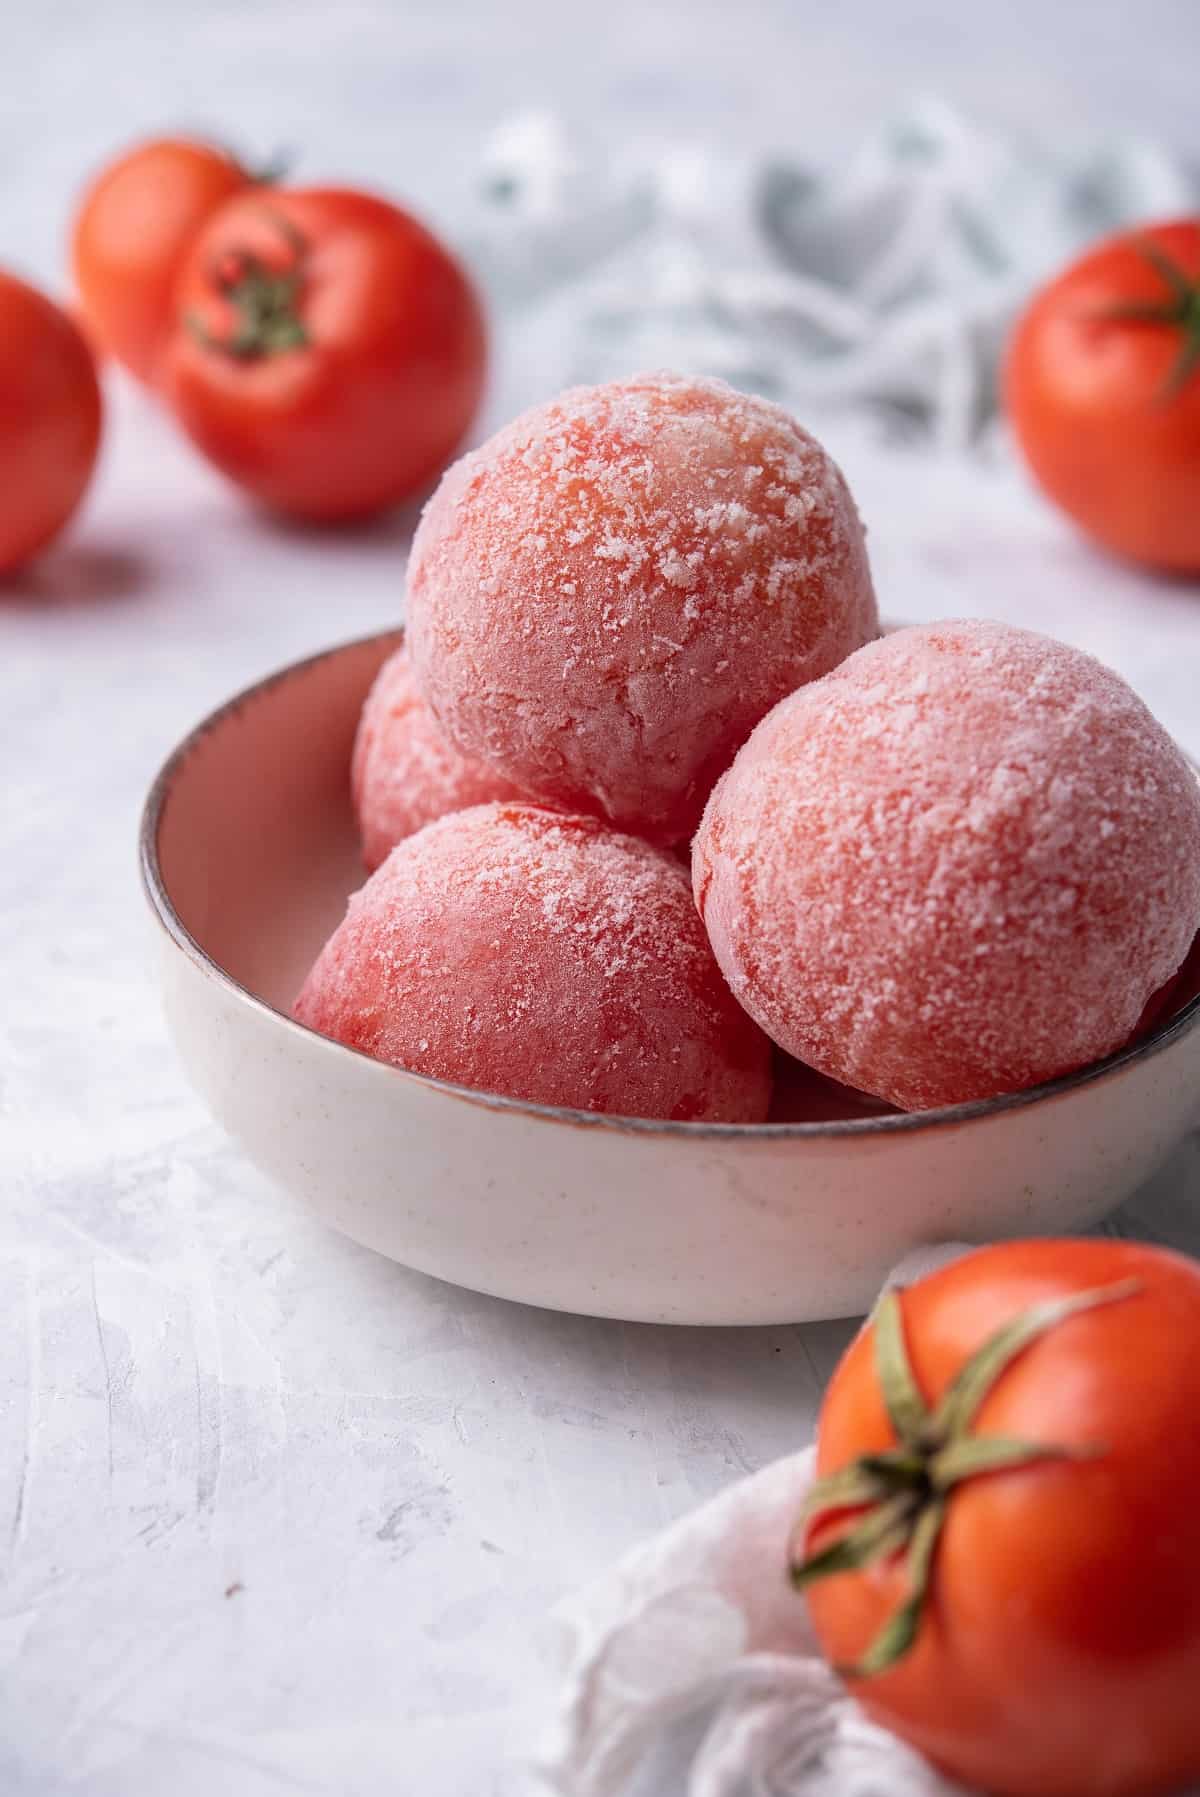
Label and date your packages of frozen tomatoes and transfer them to your freezer for long term storage. When properly prepared and packaged, your frozen tomatoes will last for about 6 months!
How to Thaw Frozen Tomatoes
Method 1: Don’t!
In many cases, you don’t necessarily need to thaw your frozen tomatoes before you can use them! If you are using them to make a sauce or soup which will be cooked for a long time or pureed at the end, you can toss whole frozen tomatoes into the dish raw, as they'll have plenty of time to thaw and break down in the presence of heat.
Method 2: Overnight in the Fridge
If you’d like your tomatoes to thaw completely, the best way to do this is to transfer them from the freezer to the refrigerator the night before you need to use them. This allows the frozen tomatoes to defrost slowly and safely with minimal effort on your part!
Method 3: Quickly in Water
If you need your frozen tomatoes to be ready for use sooner than later, you can hasten the thawing process by placing them in a freezer bag (if they aren’t already) and submerging the bag in a large bowl of lukewarm water.
You can leave this setup at room temperature for as long as it takes the tomatoes to become soft, changing out the water as often as needed.
Take note that it’s important to keep the tomatoes in a sealed bag as opposed to placing them directly in water. Doing so would cause them to become waterlogged, thereby diluting their precious flavor!
Freezing Tomatoes FAQs
Can You Freeze Tomatoes Without Blanching?
While we definitely recommend blanching and peeling the tomatoes before freezing them, you can skip this step if you’re short on time. Once the frozen tomatoes defrost, you’ll have a chance to peel them then as well. Or, if you don’t mind a few tomato skins in your soup or sauce, just leave them on!
Do You Remove Seeds When Freezing Tomatoes?
You’ll notice that we didn’t mention anything about removing those tomato seeds before freezing. This is because in order to seed a tomato, you essentially have to tear it apart, and tomatoes freeze best when kept intact,
If you would like the seeds to be removed before you cook with your tomatoes, just run them through a food mill after you defrost them.
Does Freezing Tomatoes Ruin Them?
No way! Frozen tomatoes are certainly different from fresh in terms of texture as well as flavor, but by no means does this render them ruined.
Eating frozen tomatoes raw will not be near as enjoyable as biting into a piece of fresh tomato, but there are plenty of ways to coax delicious flavor out of your frozen tomatoes.
Ideas for Using Frozen Tomatoes
While the texture of previously frozen tomatoes will make them a poor choice for slicing and tossing on a sandwich, there are plenty of tasty ways to enjoy the fruits of your freezing labor! From soups and stews to homemade tomato sauce, here are a few ideas for using your batch of frozen tomatoes.
- Try frozen tomatoes in a slow cooker soup, as the long simmer time means that any issue of unpleasant texture will be a moot point! Our Slow Cooker Lentil Veggie Soup recipe calls for canned diced tomatoes, but your own frozen tomatoes are even better. Just defrost the tomatoes enough to roughly dice them and add with the other ingredients.
- Frozen tomatoes are great when mixed into stick-to-your-ribs sides like Red River Rice or Skillet Potatoes with Lentils. Just defrost them enough to chop, then use in place of the tomatoes when called for.
- No, you don’t have to stand over the stove all day in order to make homemade red sauce! This Slow Cooker Spaghetti Sauce is a great way to honor the rich flavor of those perfectly ripe tomatoes you worked so hard to preserve.
Final Thoughts on Freezing Tomatoes
As you can see, it's quite easy to preserve tomatoes until you have time to deal with them or, until that mid-winter mood for a burst of summer strikes you! As long as your tomatoes are nicely ripe and in good shape, they'll fare well in the freezer and are an extremely versatile staple to have on hand once defrosted.
Next time you get a pile of fresh tomatoes, feel free to save the sauce-making for another day. With just a few kitchen items and a bit of time, your tomatoes will be safely packed away and ready for you whenever you're ready for them.

How to freeze tomatoes
Ingredients
- Fresh ripe tomatoes washed
Instructions
- Wash the tomatoes

- With a paring knife, remove the tomato core.
- Make an "X" mark on the bottom of each tomato. Just score it lightly.
- Bring a pot with water to a simmer. Add tomatoes to simmering water.
- Let the tomatoes simmer for 30-40 seconds.
- Remove the tomatoes and let them cool slightly. Peel the skin off the tomatoes, starting where you made the "X" mark.
- Place the peeled tomatoes on a baking sheet lined with parchment paper.
- Freeze the tomatoes for 4 hours before you transfer them into a zip lock bag.
- Remove the air from the bag before sealing.
- Store the tomatoes in a freezer for up to 6 months.


Leave a Reply