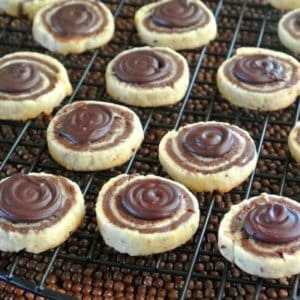
Mint Chocolate Pinwheel Cookies are easy and festive. Two thin layers of cookie dough are rolled together, sliced and baked for a special treat at anyone's holiday dessert table.
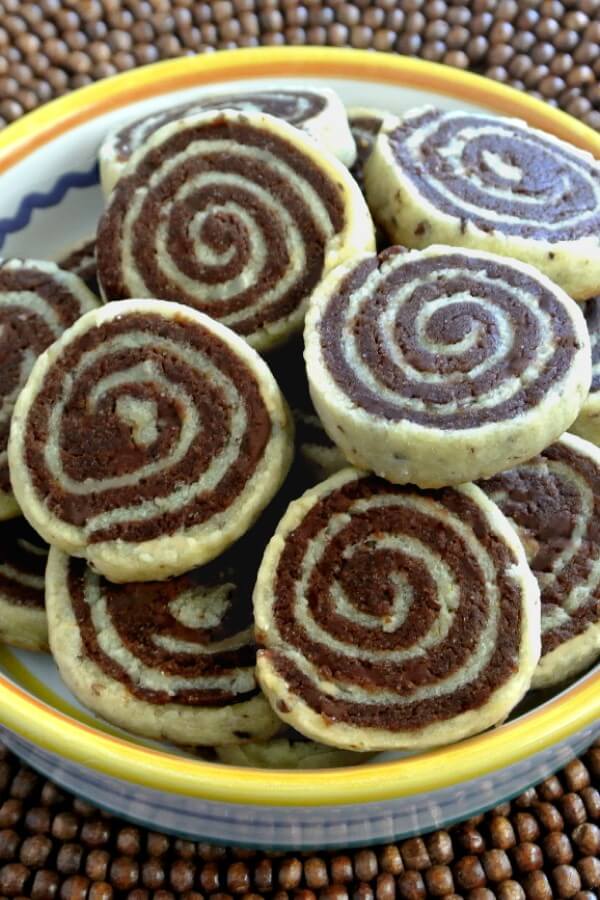
Mint Chocolate Pinwheel Cookies could never be called ordinary. They are a favorite in our house and special enough for anyone's holiday dessert table. I mean, Chocolate and Mint!
These cookies have a mild crunch, aren't too sweet, and have the perfect amount of chocolate and mint! I think they may even be Santa's favorite.
Luckily for all of us, cookies are a huge tradition all through the holidays and at every celebration. Whoever thought up the dessert table was brilliant.
All those pretty tins and plates in every color piled high with cakes and pies and last but not least cookies. Now that sounds like a nice dessert table.
These mint chocolate pinwheel cookies would hold their own on such a table and, I'm sure, disappear very quickly.
And just for the fun of it, you could make these cookies with a couple of variations too because you can never have too many cookies.
What Other Flavors Can go with Chocolate for Pinwheel Cookies?
- I'm glad you didn't leave out the chocolate part. Pinwheel cookies just seem to need chocolate as being one of the layers. Besides that chocolate seems to draw people in.
- Vanilla as the other layer would be a match made in heaven. In fact, vanilla is usually the flavor of choice with chocolate as it is in this recipe.
- Add a little bit of green food coloring to the vanilla or mint layer and have a pretty green and chocolate color theme. In this recipe, the chocolate is the mint part but it could be in the other dough half along with the green coloring.
- You could add finely chopped nuts or dates between the two layers and you would have some texture added.
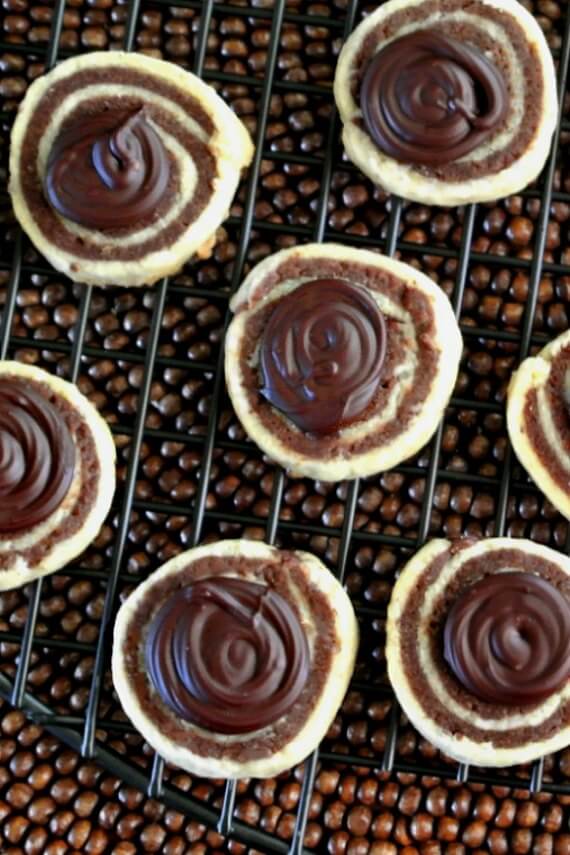
Mint Chocolate Pinwheel Cookies can be served traditionally with no icing. Or if you're a chocolate addict swirly chocolate tops can be added.
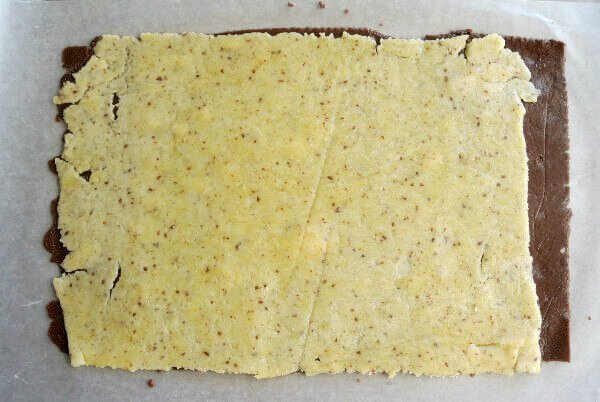
There are two layers of dough with two different flavors. You'll need a rolling pin to get the layers spread out nice and thin. Below is a picture so you can see what I mean.
They take a little bit more time than spooning dough onto a baking sheet but they are so worth it and they are a classic. You will impress everyone - starting with yourself.
Follow the directions in the recipe card so that you can turn out beautiful and tasty cookies with ease.
You can freeze these cookies for up to 6 months.
They defrost quickly so it really doesn't take any planning. Just put them on a plate for an hour or so and enjoy.
📋 Recipe
Mint Chocolate Pinwheel Cookies
Ingredients
- ½ cups chocolate chips - if not doing a topping or 1 ½ cups Chocolate Chips if you are going to do a topping
- ⅓ cup sugar, organic
- ¾ cup dairy free butter, softened
- 1 tablespoon Flaxseed Meal and 3 Tablespoons water
- 1 teaspoon vanilla extract
- 1 Tablespoon mint extract
- 2-¼ cups whole wheat pastry flour
Instructions
- Mix the flaxseed meal and water together and set aside so it can thicken
- Melt ½ cup of the chocolate chips in a microwave. It will be under a minute. Set aside.
- In a large bowl cream the butter and sugar together until it is fluffy. This will take about 3-5 minutes.
- To the butter/sugar mixture add the flour, flaxseed meal mixture and the vanilla extract. Mix well.
- Divide the dough in half.
- Put one half of the dough in a smaller bowl and mix in the melted chocolate and mint extract.
- Now you have a chocolate dough ball and a natural colored dough ball.
- Lay out 2 large pieces of waxed paper (about 15-16" long each).
- Lay one of the dough balls on a piece of waxed paper and flatten a bit.
- Roll out to a 9" x 13" rectangle. You can keep cutting off the edge where it protrudes out of your shape and lay it where you need more dough.
- Do this with the other ball of dough on the second piece of waxed paper.
- Invert the chocolate rectangle onto the natural colored rectangle. This is tricky because you really can't move it once it lays down. They are pretty thin sheets and stick together.
- In the photo above I have the white on the chocolate but I layed another piece of waxed paper on top and flipped it over.
- Then I cut off the extra chocolate dough on the end and, okay I'll admit it, I ate it. Yum!
- The chocolate tends to crack a bit as you roll so that is why you want to roll with the natural colored dough on the outside/underside. It is not this dough recipe specifically but all pinwheel chocolate dough tends to crack.
- Peel off the waxed paper from the top.
- Starting with the long side - roll the dough a bit firm so the dough touched but not tight.
- Now you have a long roll. Cut in ¼" slices (or a bit wider is okay too).
- Placed on an ungreased baking sheet.
- They do not spread out much as they bake so they can be pretty close together. Like 1" at the closest.
- Bake 10 minutes at 375 degrees.
- Let cool 2 minutes and remove to a rack to cool completely.
- You do not need to put a chocolate topping on them because they are delicious as they are but my husband wanted more chocolate so I did half of the cookies with a circular layer of chocolate on top.
- If you want to put chocolate on top just melt the other cup of chocolate chips in a microwave and pipe on in a circular motion when the cookies are cooled.





Amy @ What Jew Wanna Eat
These look delicious, Ginny! Chocolate and mint is a favorite combo of mine.
Ginny McMeans
Thanks Amy! Mine too!
April
Hi Ginny,
At what point do I add the flour? I know pastry recipes sometimes are finicky so I don't want to add it when I shouldn't.
Thanks....... April
Ginny McMeans
Hi April, I added it in up above and right after the creamed butter and sugar.
Melissa | Persnickety Plates
I made some very, very similar for a recipe swap that I'll be posting next week. Yours turned out so pretty!
Cindy @ The Sweet Nerd
I love pinwheel cookies - can't get enough of them. I like that you use whole wheat flour.
Thanh | Eat, Little Bird
I have always wanted to make pinwheel cookies. Thanks for the recipe!
Iman
These are so cute! Love pinwheel cookies
Brandi
These look so creative! I love your combination of ingredients!
Sandi
These pinwheel cookies look so fun! My kids would try to unravel them as they eat 🙂